Configuring Self Service Modern Layouts and Views for the Workspace
Role: Administrator
Minimum Version: Ivanti Neurons for ITSM 2026.2.
In Self Service UI V3, modern layouts provide a structured, grid and gallery based design that improves usability while safeguarding existing workflows. These layouts replace legacy views with Grid and Gallery views. Self Service modern layouts currently support only the Knowledge and Announcements workspaces. For information about other modern layouts see Configure and Assign Views and Layouts Using the Modern Page Designer.
Enable the Modern layout
1. Log in to Neurons for ITSM as Administrator.
2.From the Configuration console , go to Build > Global Constant.
3.Set EnableNova to True.
Prerequisites
Before configuring modern layouts, ensure the following:
•Ensure Self Service UI V3 is enabled. For more information, see Getting Started with Self-Service Management Portal V3.
•Ensure that the EnableNova global constant is set to True.
1.In Configuration console, go to Build > Business Objects.
2.In Find text field, enter a workspace name and then open the workspace (for example, Announcement).
3.In the workspace, select Layouts tab and click Add New Layout.
A pop up window appears.
4.In the window, select Try Modern Designer.
The Modern Designer window opens in a new tab.
An onboarding dialog appears, you can select Skip or walk through the tour or select Do not show again checkbox to hide it in future sessions.
By default, the Announcement workspace is selected in the top dropdown.
5.In the Modern Designer window, select Add New Layout.
The Create Layout window is displayed.
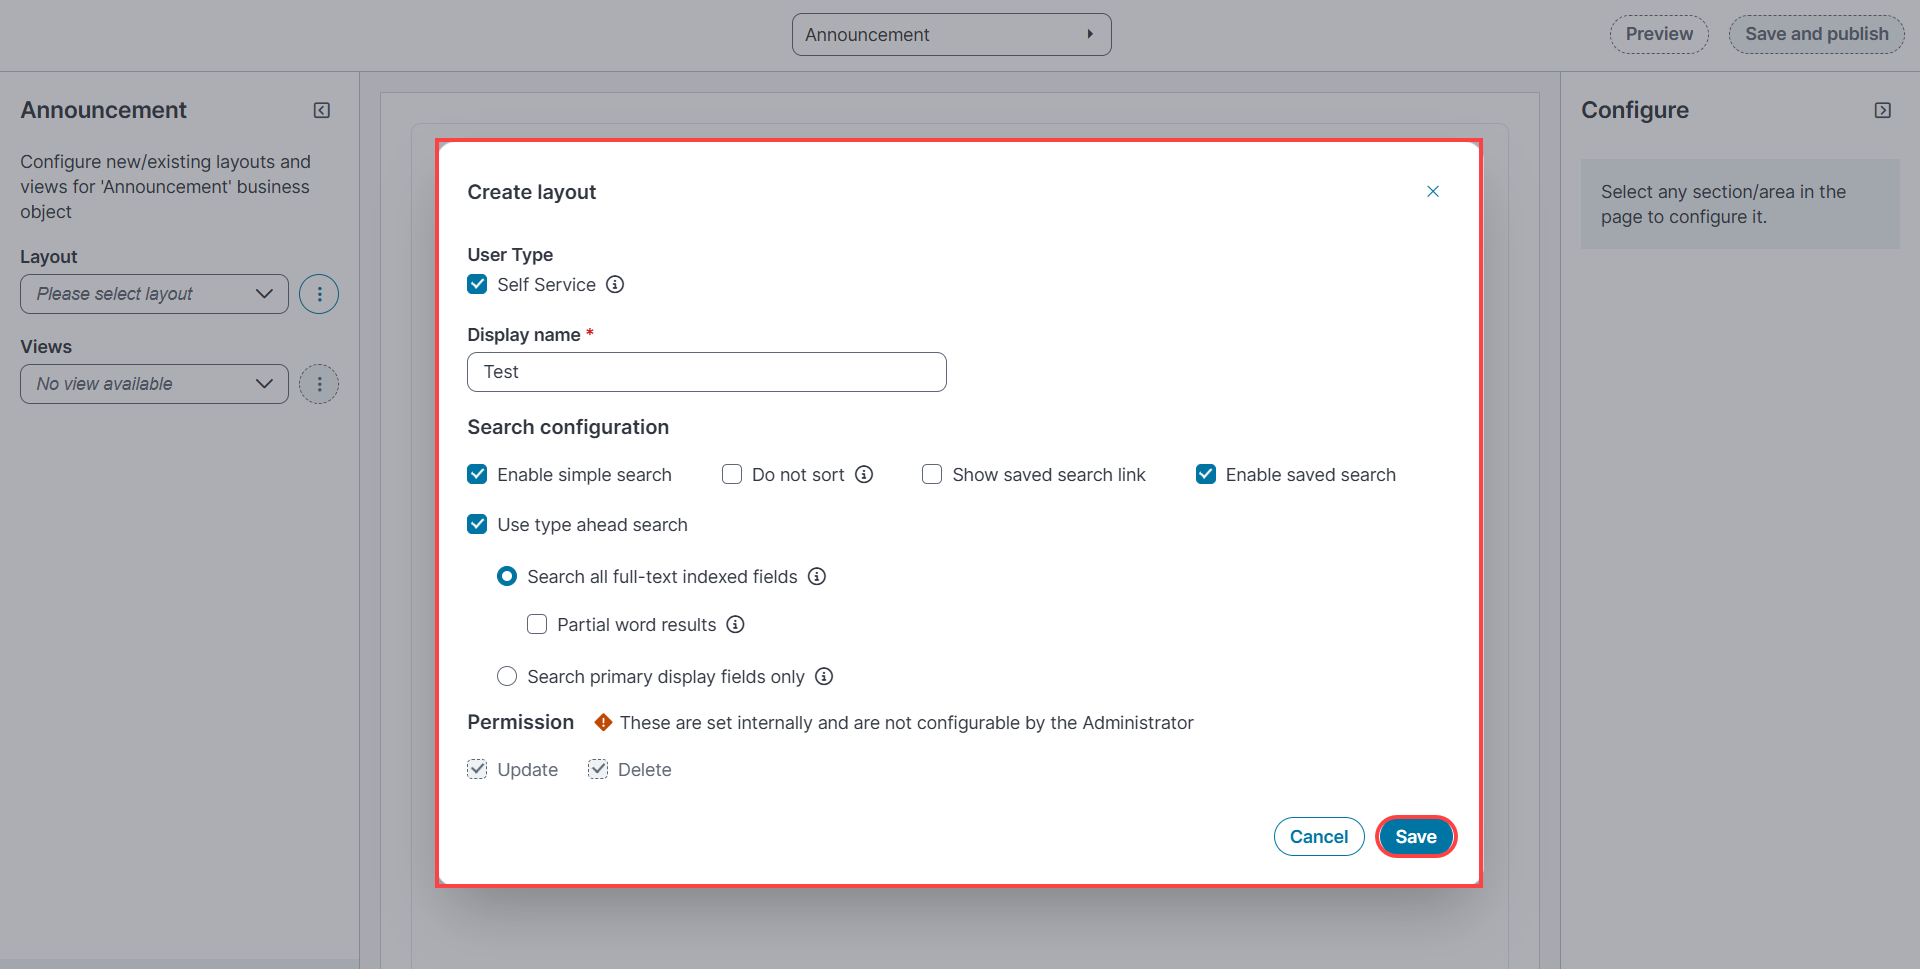
6.Select Self Service checkbox to enable layout creation for Self Service UI.
7. Enter a name, select the required options in Search configuration section, and hover over the information icon to review option details.
8.Select Save.
A confirmation message indicates that the layout is created.
1.In the main window, select Add New View.
2.In the Create new view window, choose one of the following types:
•Data grid – Displays records in a grid format
•Gallery view – Displays records in a gallery format
You can view the form view options to configure view for workspaces. However, in Self Service UI V3, the final UI does not display the modern page layout.
3.Configure the selected view type:
• For a grid view, see Configuring Grid Views
•For a gallery view, see Configuring Gallery Views
After you configure the required grid or gallery view, continue to step 4.
4.Select Preview to review your changes.
Ensure the view is set to Gallery or Grid before saving and publishing the changes in Manage Views.
5.Select Save and Publish to apply the configuration.
1.In the Select view type tab, select data grid from View type dropdown.
2.Enter a name for grid view and click Save.
The Properties tab is enabled.
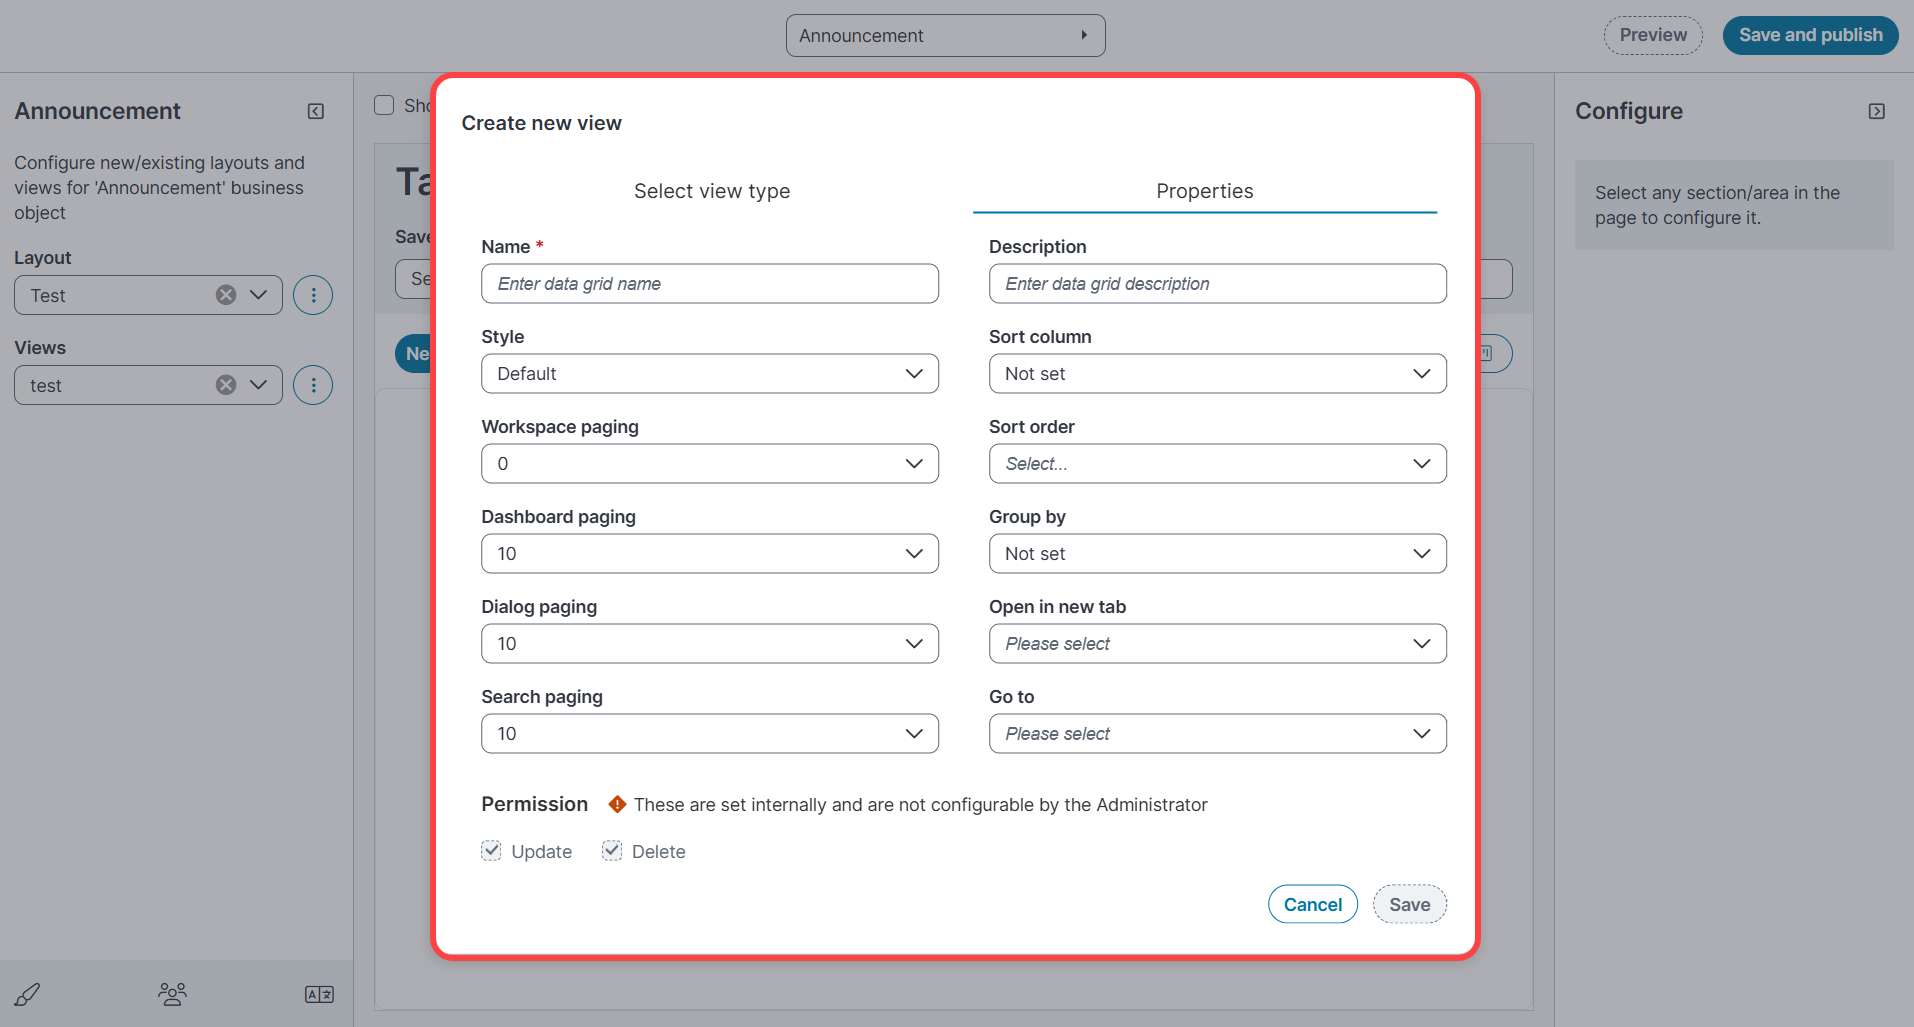
3.Enter a display name and select style in dropdown, choose one:
•Default – Uses default text styles
•Highlighter style – Select a predefined style
•Expression editor – Define custom formatting
4.Configure page options for workspace, dashboard, dialog, and search.
5.Select additional options as required and select Save.
The data grid view is created.
6.In the workspace section (for example, Announcement), select the created grid view and then select configure data grid.
The available fields are displayed.
7.To add a field, select a field from Available Fields column and select Add Selected.
8.To reorder columns, drag and drop the columns, and then click Reorder columns.
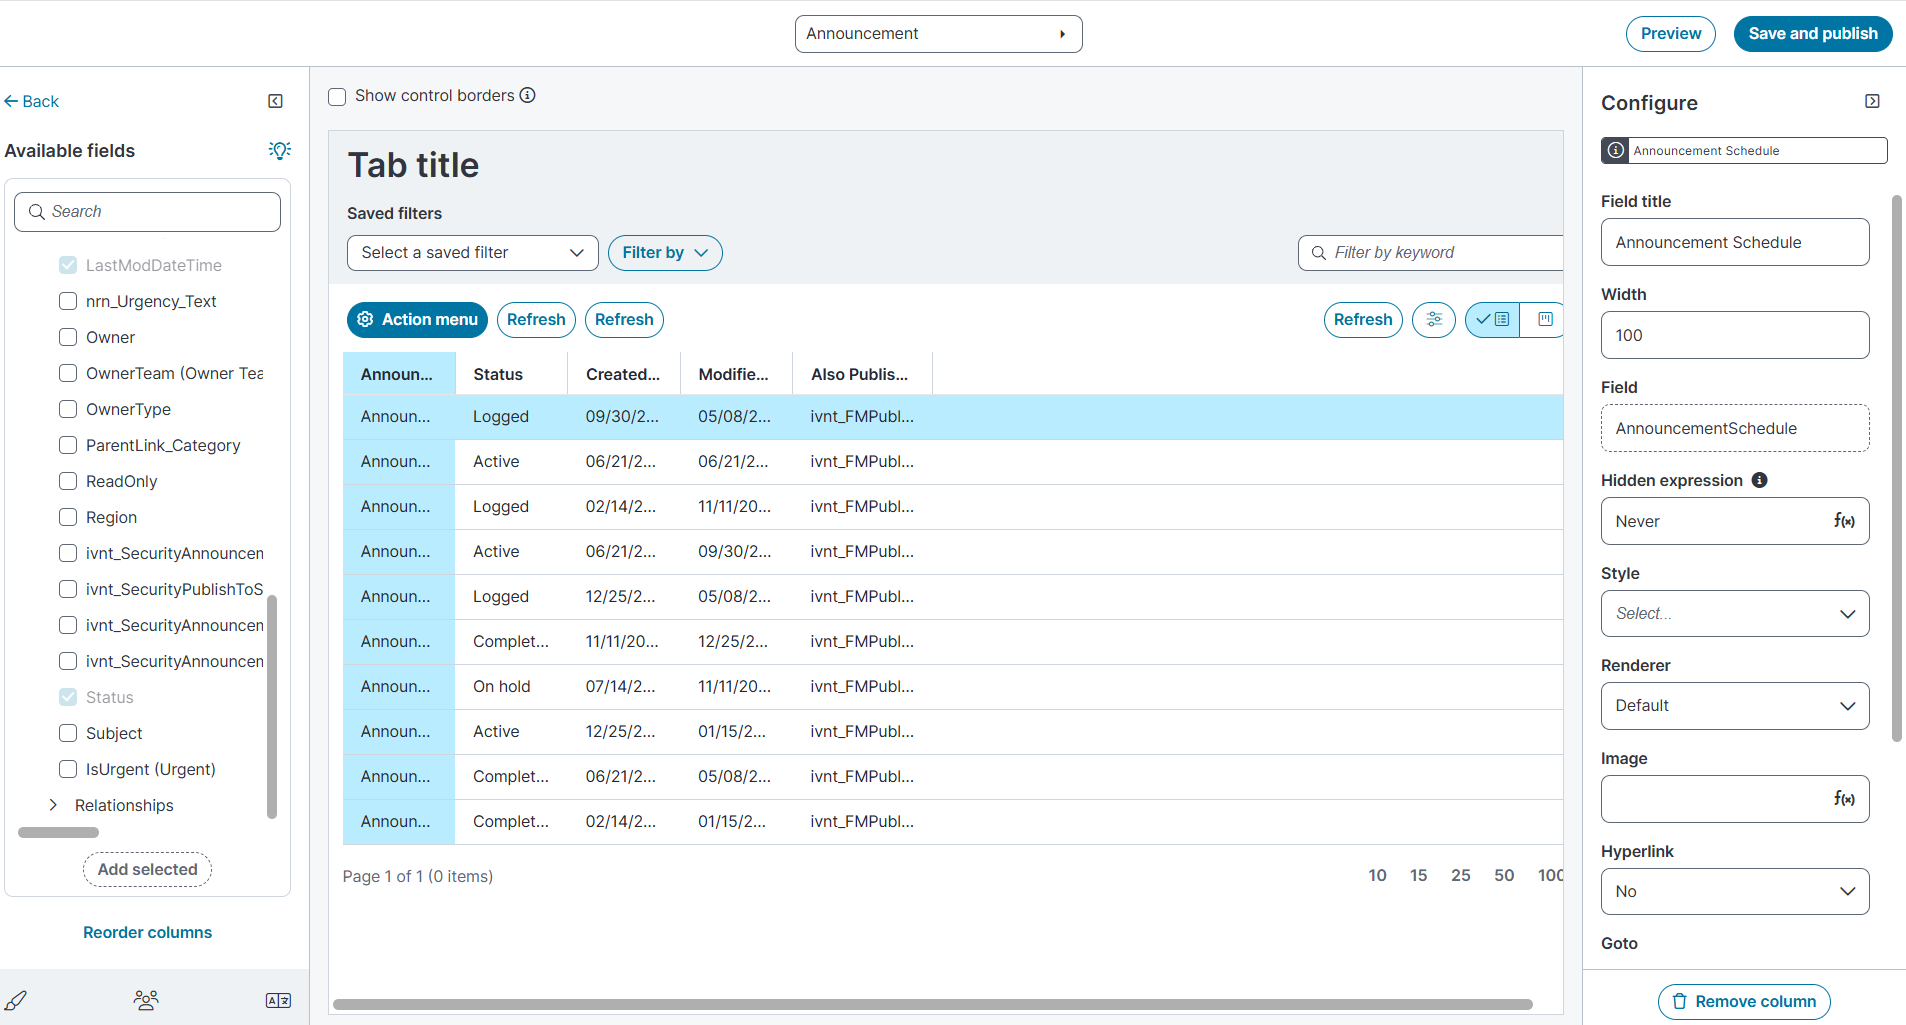
9.In the configure section, modify the field details such as title, column width, Renderer style, or add an image and other modification, toggle on the required options.
In the Self Service modern layout, the following options are supported for Renderer dropdown:
•Bulleted inline list for text fields
•Star rating for number fields.
10.To remove the column, select the required column and click Remove column.
11.To preview your changes, select Preview in the main window.
12.To save and apply all customized options, select Save and Publish.
1.In the Select view type tab, select gallery view from View type dropdown.
2.Enter a name for gallery view and click Save.
The Properties tab is enabled.
3.Enter a name and appropriate description then select the required options and click Save.
4.In the Announcement section, select configure the gallery view and select required options to customize.
The Available fields are displayed.
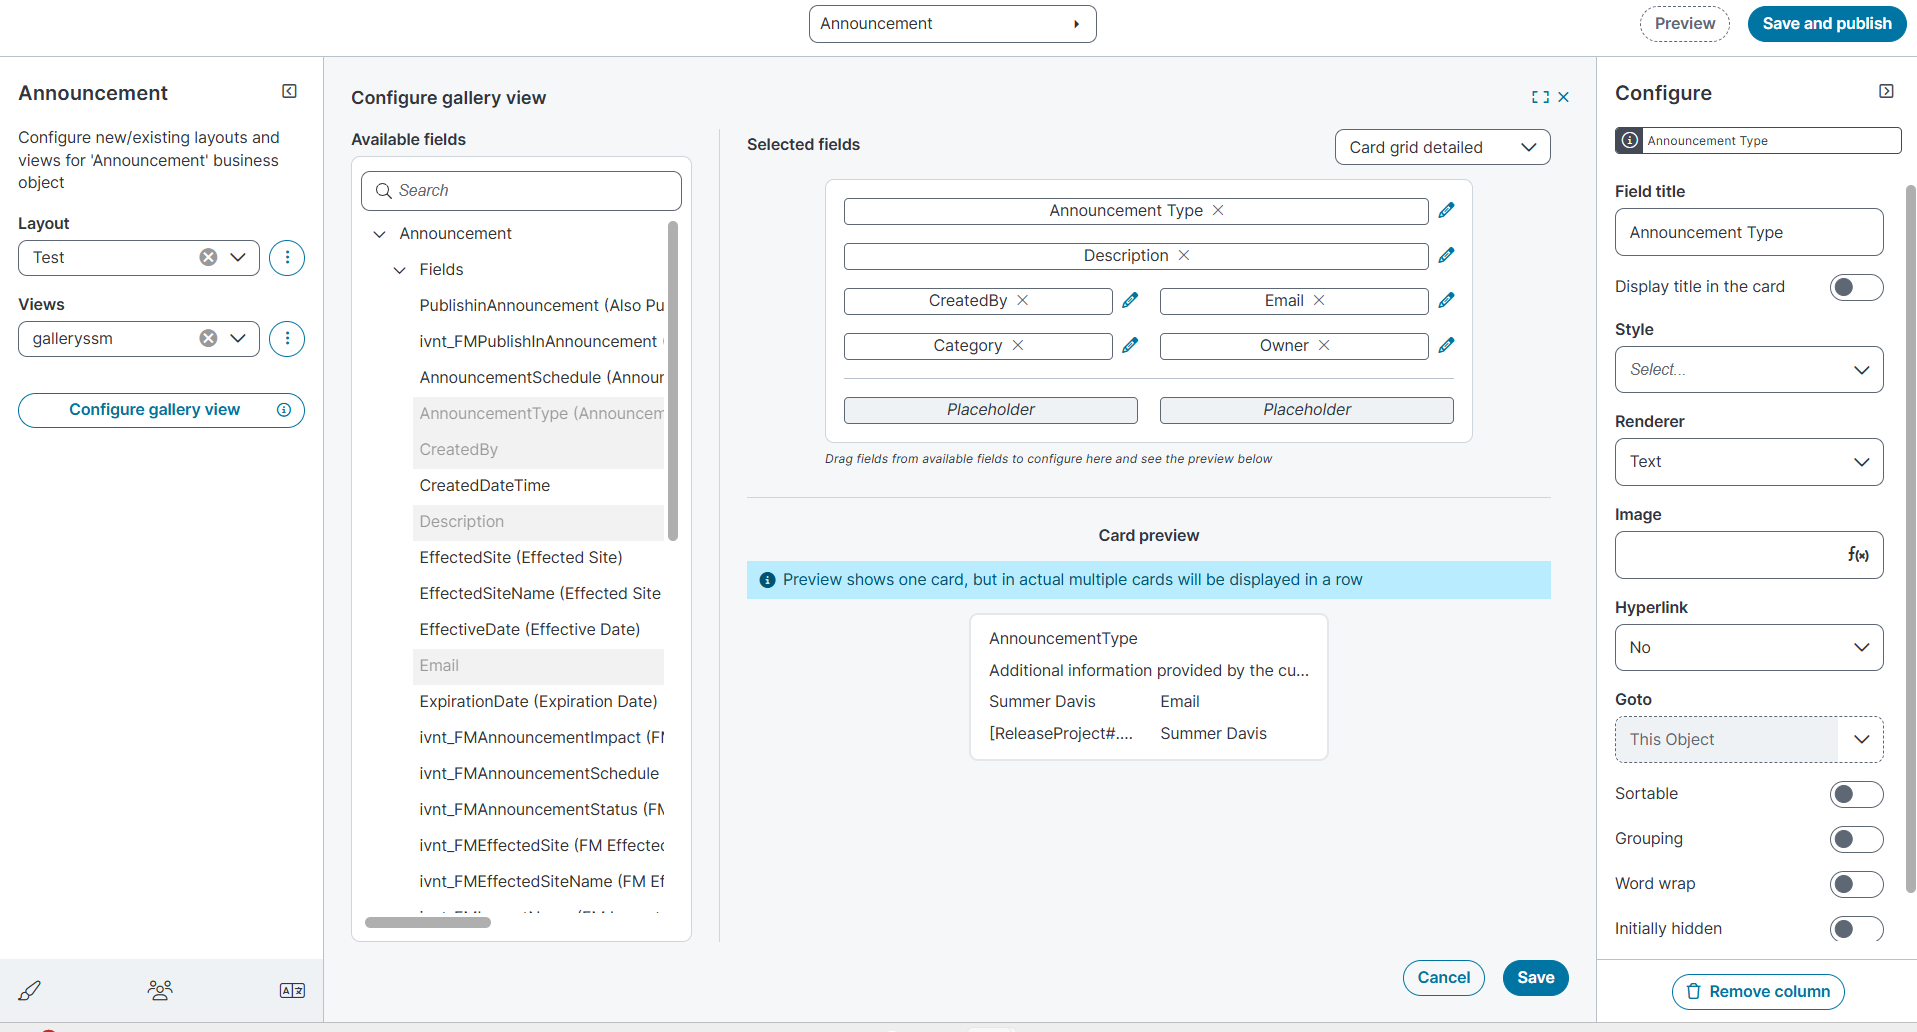
5.To add fields, drag and drop the required fields from available fields column into the Selected Fields area.
6.Select the Edit icon next to a field to modify its title, style, renderer type, or to add images or hyperlinks, toggle on the required options.
In the Self Service modern layout, the following options are supported for renderer dropdown:
•Bulleted inline list for text fields
•Star rating for number fields.
7.To remove a field, select it and click Remove column.
8.Select Preview to review the layout.
9.Select Save and Publish to apply the changes.
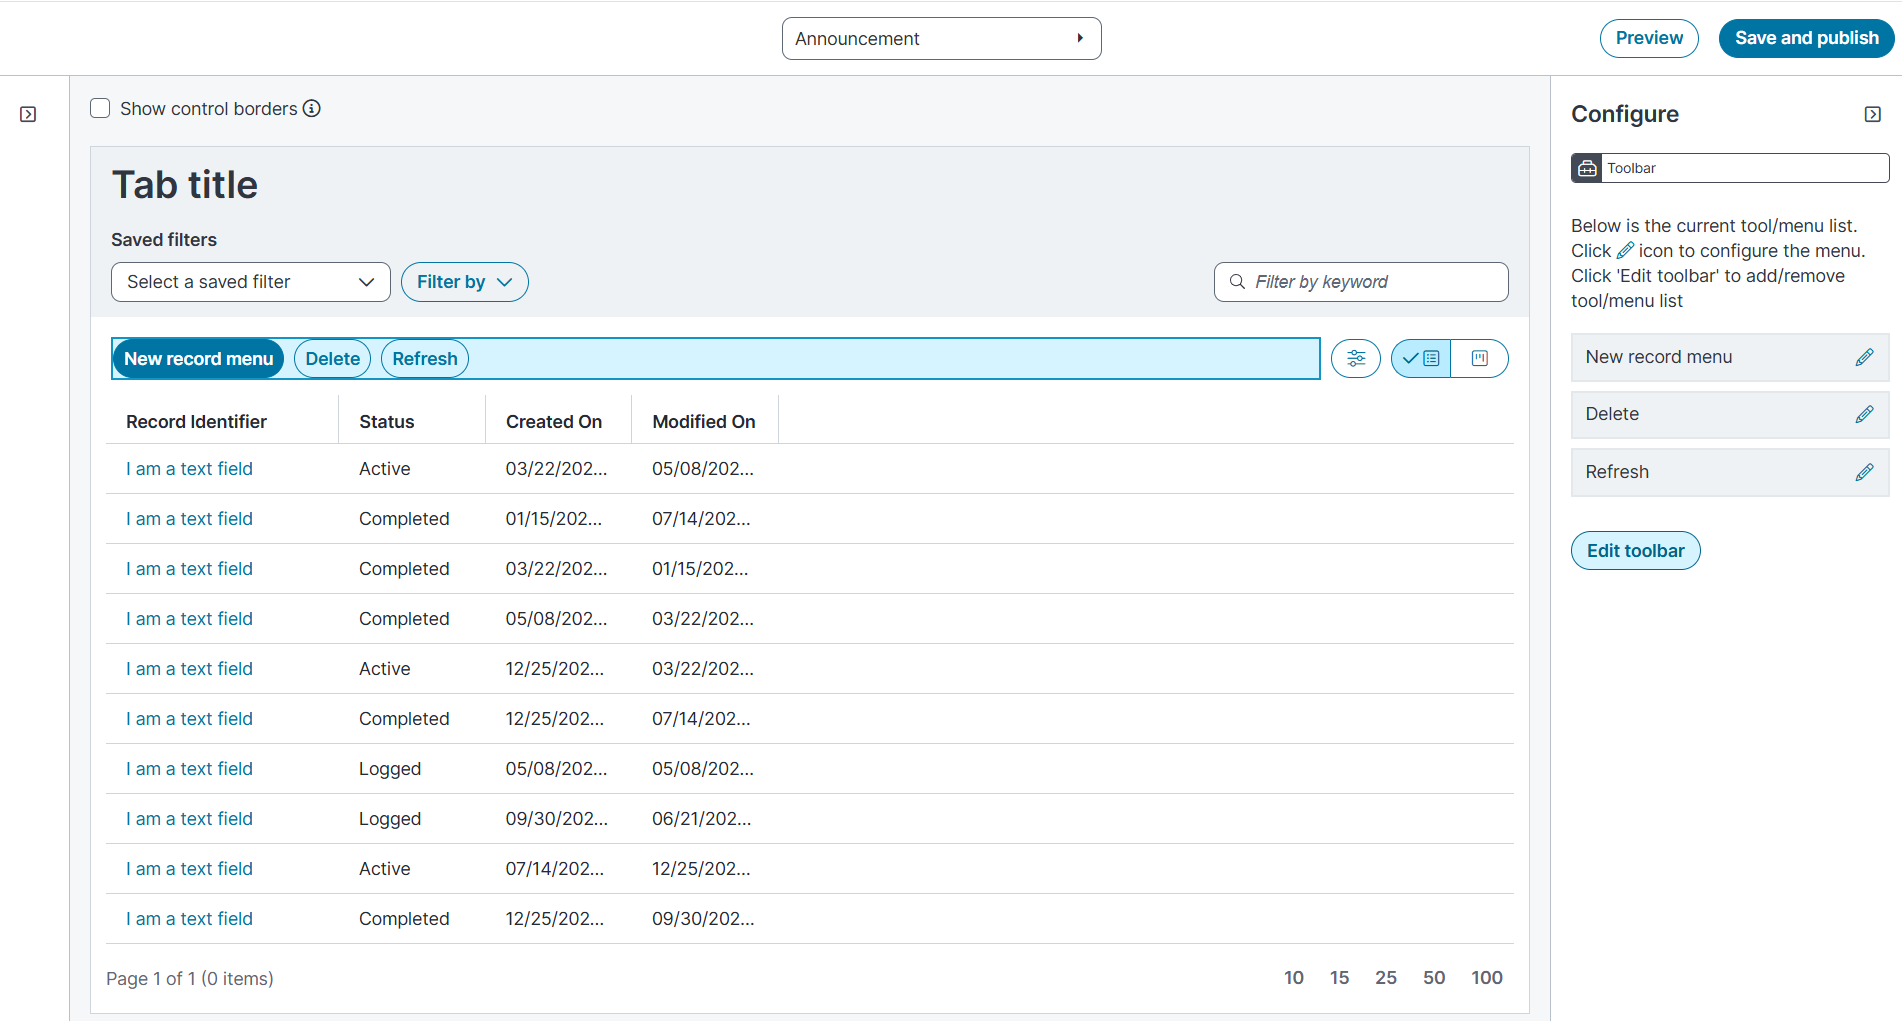
In the Tab Title section, you can design and edit the toolbar after creating layouts and views.
Under the Tab title section, the Select a saved filter and Filter By dropdown options are not editable.
To customize layouts and views:
1.Select Show Control Borders to display editable regions.
2.Select menu.
The Configure section is enabled.
3.Select Edit toolbar to view and modify the tool list.
Only the refresh action can be added to the left or right section of the toolbar.
4.Select the Edit icon next to a tool to modify its name or options, then select Ok.
5.To preview your changes, select Preview in the main window.
6.To save and apply all customized options, select Save and Publish.
1.In the Announcement section, from the layout dropdown, select the created layout.
2.In the Views dropdown, select ellipsis icon adjacent to views field and then select Manage views.
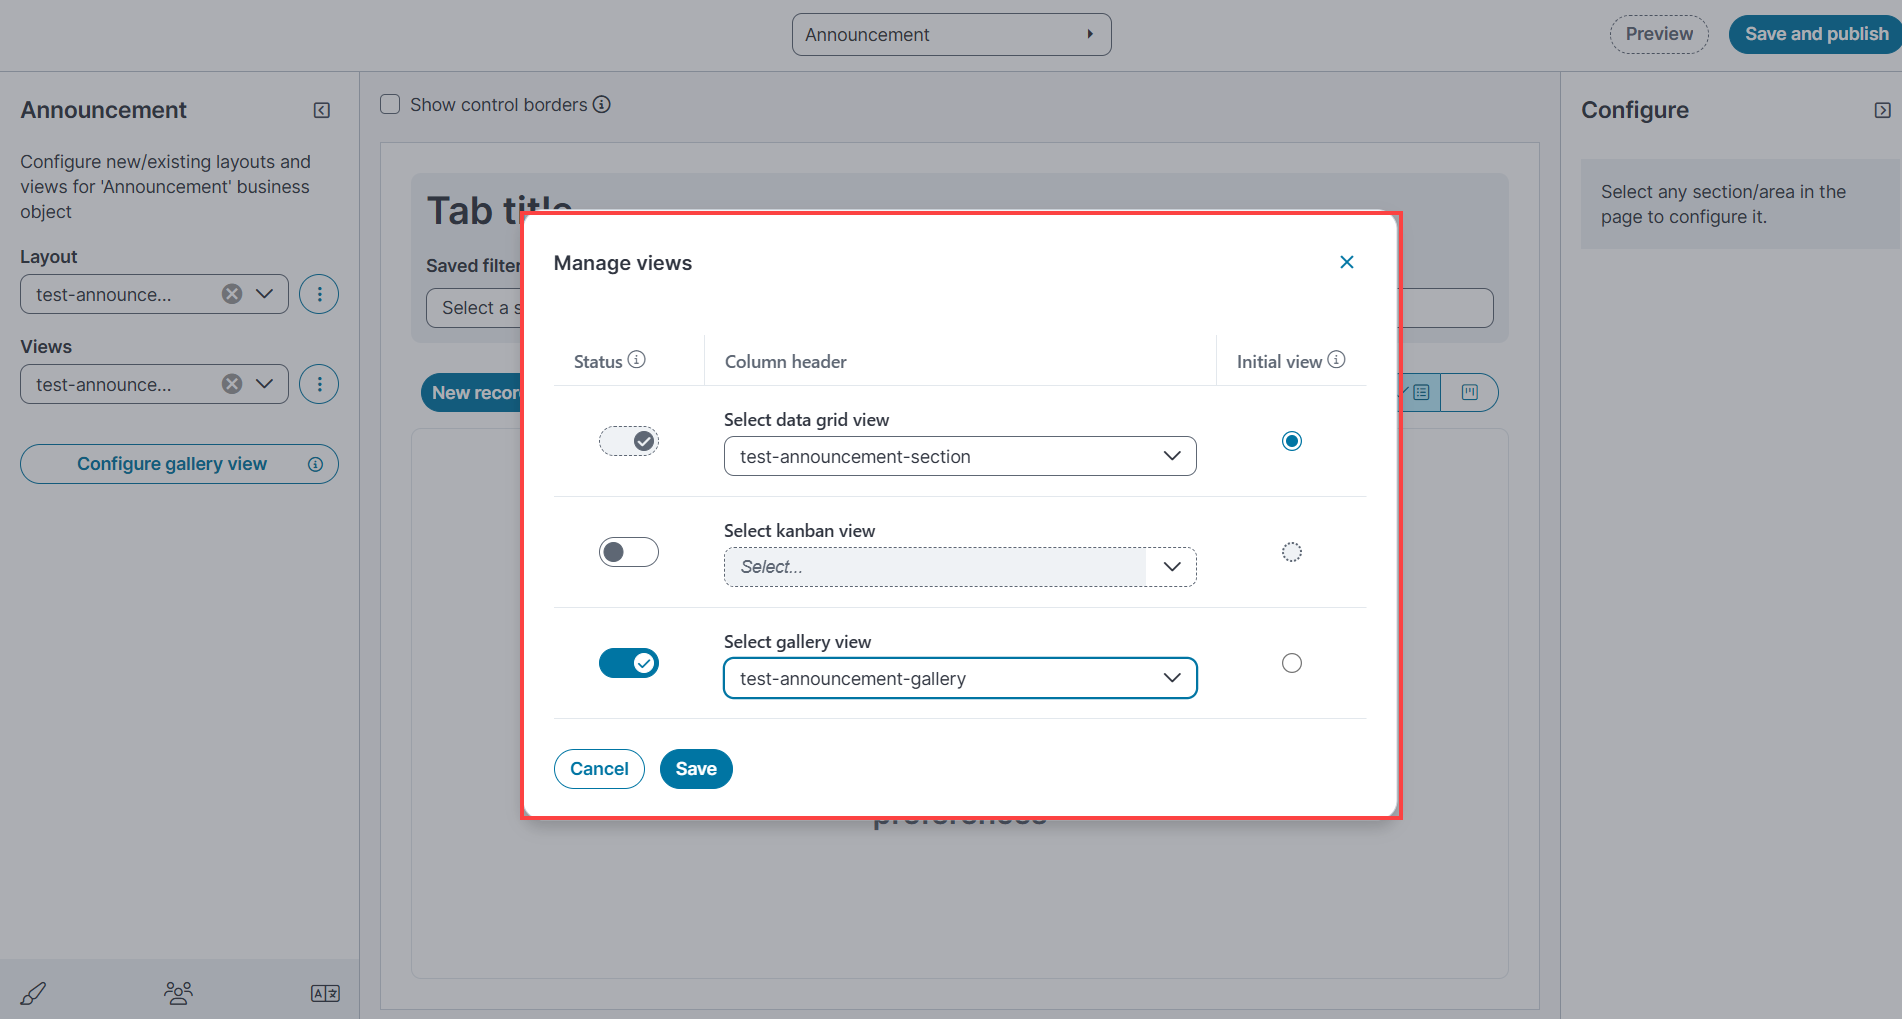
3.To select the views to display, toggle on the status column for any of the view and select the created layout from dropdown.
4.To set the required view as initial view, select the required checkbox in the initial view column.
5.In the main window, select Preview to review, then select Save and publish to save.
Ensure that a default view is set for the selected initial view. This configuration is required for the Announcement workspace detail view to render correctly in the Self‑Service UI.
1.In the Configuration console, go to Configure > Users and Permissions > Roles and Permissions.
2.Select SelfService Mobile.
3.In the window, select Top level tabs and select Announcement workspace.
4.Select the created layout from the layout dropdown.
5.Select Save.
The system applies the selected layout and views to Self Service UI V3.
To view the Detail section for the Announcement workspace in the Self Service UI, ensure that a default view is set for all the customized views, or at minimum, for the view selected as the initial view.
1.In the Announcement section, select configure the gallery view or configure the grid view.
2.Click ellipsis icon and select Edit.

3.Select the Use form view from existing layout checkbox.
4.In the Select another layout dropdown list, select the layout that was previously set or customized layout, other than modern layout.
5.Select Form View for On request Create new object and On request to Edit existing object dropdown.
6.Select Save to apply the changes.
•If you configure the form view for the Knowledge and Announcement workspaces in the modern page layout, the fallback option also defaults to the modern page layout. However in Self Service UI V3, the final UI view displays the classic page layout, consistent with the earlier experience.